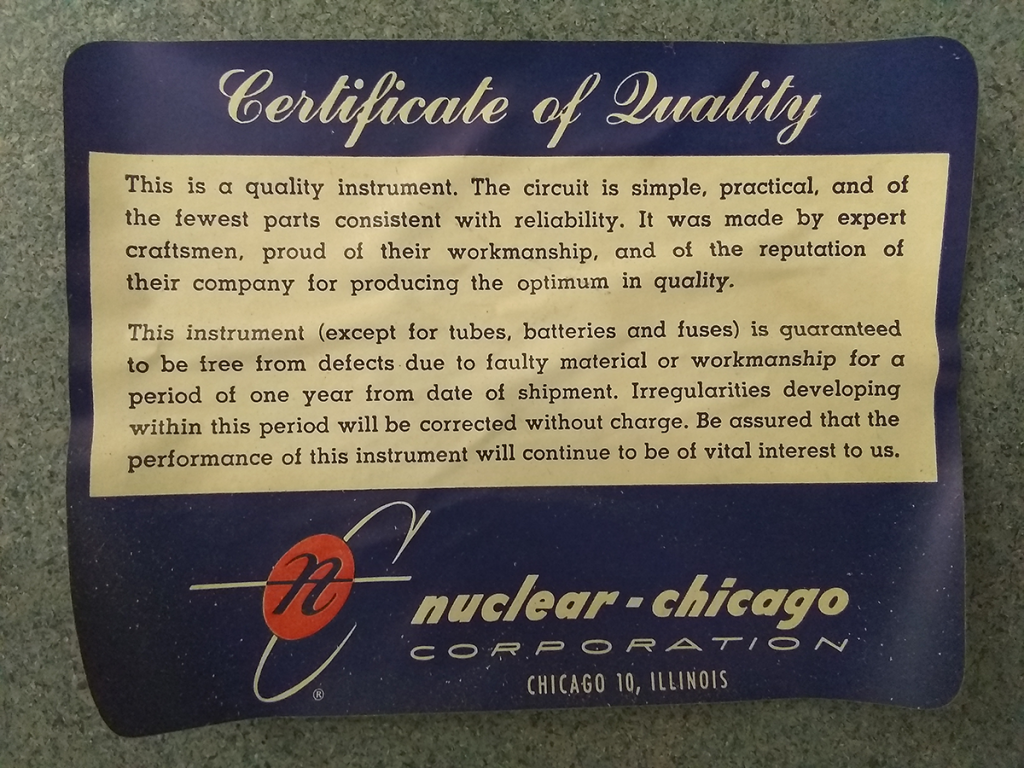
Cobalt-60

Cobalt-60 sample
Bright yellow says “do not misplace me.”

Radioactivity makes people squirm. It’s not hard to understand why. Whereas most potential dangers offer some sensory warning, radioactive materials don’t. For the most part. If your senses are picking up the direct effects of radiation, you are long past any level of safe exposure. Somehow, things have gone quite sideways for you.

But this is introductory Physics lab, and we’re here to learn in a safe environment. We’ll stick to sources that keep below the United States Nuclear Regulatory Commission’s Exempt Quantity Limit. That’s readily available in the table from § 30.71 Schedule B, which indicates the limits in microcuries [µCi] for a wide range of nuclides. In our labs, we use cobalt-60 and cesium-137 for different purposes, though you can have fun reading through the entire table to remind yourself that dysprosium, hafnium, and samarium are all on that periodic table, too.

Lots of elements struggle to become household names. Maybe it’s for the best that most of don’t have to concern ourselves with the particulars of terbium on a daily basis. (It’s key to creating the green phosphors essential to fluorescent light, so now we’ve all learned a new factoid.)

We use these little 1-inch disks as relatively constant reference sources in labs. The disk, of course, is way bigger than the tiny chip of cobalt inside, which randomly decays into a stable isotope of nickel-60, spitting out a beta particle (an electron) and some gamma rays (high-energy photons). While it’s impossible to predict when any specific atom will decay, a sufficient quantity of them all bunched up together result in an output that’s mostly predictable. In any given second, you might hear several (or zero) clicks on your Geiger-Müller counter, but if you count them over longer intervals, the clicks-per-interval numbers get awfully close to each other.

With a half-life of 5.27 years, one little disk of cobalt-60 can handle years of students labs. While we wait for Physics 212 to roll around again, they bide their time in this little box:

Lead-lined box
Big sticker!

We keep it way in the back of a locked storage room. It’s lined with lead on the inside, even if that’s not strictly necessary. You probably shouldn’t stuff a bunch of cobalt disks in your pocket for the day, and you definitely shouldn’t eat any. (Physics labs don’t typically use edible materials, and even when we do – such as non-dairy coffee creamer – we mark them as not for consumption. Just don’t eat anything in the lab, okay?) It does keep everything in one easy-to-find place, though, and big CAUTION stickers tend to keep curious fingers out.

We use big, scary yellow CAUTION signs in the shop to keep curious fingers away from sharp objects, too. Sharp and poky things are way more likely to ruin your day around here. So be careful, please.

Plans

Architectural plans
Stamps, signatures, and everything!

Tucked away in a back corner – we have so many of those – sits a set of the architectural plans for the Tressler Observing Laboratory from 2014. What had once been an exterior deck is now, thanks to a very generous gift, a fully enclosed structure housing six telescopes. On a good night for observing, or astrophotography, or simply appreciating the wonders of the cosmos, the building’s roof slides away, revealing the night sky. It’s a neat trick.

The plans are a (recent) historical artifact, a little water-damaged, but still fully readable. Nothing much in here you can’t just walk over and see in person, of course. For those with an architectural inclination, though, skimming through detail drawings is an always-interesting pursuit.

Hastings Triplet

Hastings triplet loupe
Sometimes it’s the little things.

We field a lot of requests for small objects in the shop these days. It’s not that there aren’t plenty of big/huge/enormous things worthy of serious research and scholarship (see: stars), but physics sometimes gets wild when you go small. And not even quantum mechanics small… that’s where calling physics not intuitive doesn’t even begin to cover it.

We’re talking channels and structures where 100 microns makes a difference. A micron, or micrometer, is one-thousandth of a millimeter; 100 of them is a tenth of a millimeter. In the general ballpark of the width of a human hair. It’s the scale where you learn the finer points of a tool’s tolerances, where you set a machine to do the work and wait until it’s all finished to figure out if it worked.

Mistakes happen.

Very tiny things also defy your eyes’ ability to inspect them, so we rely on microscopes and other optical magnifiers to check on the quality of work. One of the handiest is the magnifier shown above, a Bausch + Lomb Hastings Measuring Magnifier. It uses a Hastings triplet lens system, composed of three separate glass lenses bonded into a single, composite lens. Doing so produces crisp, distinct images without distortion. At the end it has a scale, so that we can press it against an object to inspect and actually measure features less than a millimeter across!

View through loupe
Very small. Very small.

One of the best features of this magnifier is its portability. At 7X magnification, it’s less powerful than a microscope, but its case fits in a pocket, so it can go anywhere. Clear plastic sides admit plenty of ambient light, removing the need for additional illumination that a microscope requires. You simply pick it up, inspect your object, and carry on. Confirm that microfluidics channels are the proper width. Ensure that you’ve cleaned all the swarf away from tiny features. Examine tools up close for minor damage to their edges.

Or check out the tiny world all around you, just because you can. Some of the best science starts with noticing something neat, and just digging deeper.

Trig-O-Matic

Wire stripper, closed
Grasp.

With enough drawers, boxes, bins, and dark corners in our shop and storage rooms, you’re bound to run across the occasional tool that you wish you’d known about sooner. Maybe it’s useful. Maybe it’s fiercely specific. Maybe it’s just a special sort of ingenious. Maybe it’s a pair of squeeze-and-strip wire strippers.

We have several pairs, but only this one is dubbed the Speedex TRIG-O-MATIC. Nothing like a glorious Space Age name to capture that little extra bit of attention.

Wire stripper, first stage
Squeeze.

Feed an insulated wire through the clamps – or several, once you’ve had a bit of practice – up to the adjustable guide. As you start to squeeze the handles, the left-side clamps gently grasp the wires, holding them steady. Then the notched blades close, cutting through the insulation surrounding the wire. The last step in this little dance splits the tool down the center, pulling wire and insulation in opposite directions, effortlessly.

Wire stripper, second stage
Split.

Cleanly stripped wire, courtesy of the two ugliest birds you’ve ever seen. (What two-headed oddity do you see in that picture?)

At this point, you may be wondering when a relatively complicated gizmo like this would be worth having. After all, it has a lot of moving parts, and the more parts something has, the more parts it has that can break. A pair of basic wire strippers, or even just a pair of pliers with wire snips can do the job quickly and cleanly. Right? Well, there are two situations when this little tool is just the bestest thing ever.

1) When a novice needs to strip a few wires and doesn’t need to spend the time (and mistakes) to learn good, practiced technique. We were all there once.

2) When it’s time to put together toy kits for PHYS 212, and all of those lengths of wire* – each with two ends! – need to be stripped and tied. After a while, you get very good at clipping several at once, until it becomes a game to see how many you can manage. Yes, there’s a ceiling.

Toy kits! A subject for a future post: each semester, we put together hundreds of packs for the PHYS 211 and 212 students, full of odds and ends to use for problem sessions. They’re wondrous assortments of odds and ends (and honest-to-goodness toys!) that illustrate the principles of physics through just being neat-o.

* Cutting hundreds of pieces of wire to a specific length is its own problem, and there’s a shop-made solution for that. If you have to do a job a dozen (or a couple hundred) times over, build a jig!

Fulgurites

Box of petrified Jersey lightning
“Petrified Jersey Lightning”

We have multiple storage rooms, each with shelves, cabinets, drawers, and seemingly endless places to tuck away small objects. It’s easy, so easy, to simply forget something. Then, years later, someone else gets the joy of stumbling across it.

Sometimes it’s a century or more.

Petrified Jersey Lightning

or

Fulgurites from South Jersey collected by John G. [unknown]

Presented to Physics Dept 1/14/10

Fulgurites!
Neat!

That would be January 14th, 1910.

Fulgurites are a mineraloid formed when lightning strikes the earth and fuses mineral grains. They come in as many varieties as there are different types of soil, and as we’re in Physics, not Geology, our understanding of the particulars is as reliant on Wikipedia as yours.

We can only guess as to why John gifted Physics with these 112 years ago, but we appreciate it. Everyone should have the chance to stumble across a little petrified Jersey lightning from time to time.

Planisphere

Planisphere in lit room
A handy, adjustable star chart…

Astronomy at Bucknell is not just for the undergraduate students, but for the wider community, too. With a whole slew of telescopes to explore the skies, the department sometimes runs family nights and other outreach programs. Local families, summer camps, and others can – weather permitting – have the opportunity to explore constellations, deep sky objects, planets, and sometimes even the crater-riddled surface of the moon.

For those at home, an ordinary pair of binoculars works quite well for that last one. Pick a night when the moon is between new and full, and look to the transition zone between the light and dark sides. The light rays raking across the surface dramatically emphasize the texture. The full moon’s straight-on illumination is less compelling, and, well, there’s not much to see on the new moon.

In order to help explain the skies to the public, the Observatory has a planisphere, built by one of the University’s Presidential Fellowship students with the help of the shop techs. A flattened portion of the celestial sphere rotates, enabling a view of the major constellations at any day and time throughout the year. Polaris, at the center, stays steady while the rest of the sky spins about.

For added excitement, a series of colorful LED lights ring the perimeter, making the stars and imaginary constellation lines glow in the etched acrylic.

Planisphere in dark room
…that really pops in the dark.

It’s pretty cool.

Lead Bricks

Stack of lead bricks, mostly yellow
No, it’s not obvious why two are unpainted.

Yes, they’re heavy. Quick estimate, based on their dimensions (20cm x 10cm x 5cm) and density (11.29 g/cm2), each one weighs approximately 11.3 kg (24.8 lbs). That wee stack of 15 bricks runs to nearly 170 kg (373 lbs). Pushing them down the hallway on a large cart gets exhausting, quickly.

Let’s all act surprised that they were left behind in a research lab post-retirement.

These are a prime example of something that we keep around, just in case. Plus, they’re expensive. A very similarly-sized bar of lead from McMaster-Carr – 2 in. x 4 in. x 8 in. – will run you $202.42 at this moment. Fair to say that doesn’t include shipping. It might be more cost-effective to drive to New Jersey for pickup.

To our next nuclear physicist, whomever you might be: we’re holding on to them for you. Come get them anytime.

Variac

Variac autotransformer
“Adjust-A-Volt”

When a faculty member retires, they tend to leave a variety of things behind in their labs. With the busiest days of physics research behind them, and only so much spare garage and attic space, old pieces of scientific apparatus don’t make the cut. That doesn’t mean they’re not useful to someone else. Sometimes old equipment, built for a long service lifetime, still works pretty well. Those few things built without integrated circuit boards and lacking in bells and whistles? They’re tanks. We collect those, make sure they’re in good working order, and keep them handy for the next person who needs them.

Take, for example, the good, old-fashioned variable autotransformer, often called a Variac in the same way you might refer to any office copier as a Xerox machine. There are easily half a dozen floating around here. Probably more if you take time to look in the dusty corners. The short version is this: you send in ordinary AC line voltage, turn the big, chunky dial, and it sends out a lower AC voltage based on that setting. It has two moving parts: a sliding brush that moves along the wiring coils, and a switch.

Always love a reliable mechanical switch. Click!

An autotransformer has only one winding inside it, and outputs one or more voltages different from its input depending on where they tap into the coils. (A standard transformer has two windings. There are pros and cons to each.) A variable autotransformer has a sliding/rotating connection on the secondary side, enabling smooth voltage change from more or less zero to full. The number of coils the current passes through on its way to the brush’s connection determines the output voltage.

It takes advantage of the constantly-changing nature of alternating current. The flow of current creates a magnetic field; a changing current creates a changing magnetic field. A changing magnetic field creates a current in a circuit. Plugging a variac into the wall receptacle works. Connecting up a DC battery won’t.

They’re handy for testing electrical equipment, including motors whose speed is voltage-dependent. We use them in undergraduate labs in connection with incandescent lamps to study blackbody radiation; they’re a big dimmer switch that’s easy to control and understand. The core of a Mel-Temp apparatus, that workhorse staple of a chemistry lab setup, is just a Variac connected to a big resistor. The varying voltage adjusts the current, which controls the amount of heat it gives off to melt your sample.

Some of the old styles are Art Deco-ish beauties, too, with amazing names. Adjust-A-Volt! Powerstat! Every space-age laboratory deserves a few of these.

Micro Bits

Acrylic with very tiny holes
Very tiny holes

In the Physics & Astronomy shop, we make, modify, and repair things. When the thing you need just isn’t available off the shelf, it’s our job to make it happen. If at all possible.

(It’s not always possible, but we give it our best. Sometimes we surprise ourselves.)

The end result is a lot of unique, one-off objects built to do very, very specific things. They may be lab or research equipment to our colleagues, but they’re learning experiences for us. You never really know what sort of experience and expertise is going to come in handy down the road. And, yes, we make mistakes along the way.

Our desktop CNC mill makes this process just a little bit easier. We get the sort of repeatability and precision alignment in a fraction of the time it takes on a manual machine, and it can turn out tiny work that our eyes struggle to see without magnification. Recent software updates have given it proper drilling capabilities, letting us use an assortment of very small drill bits to expand the sorts of work we can accomplish. Does a project call for precisely-drilled holes on a very small scale? We can do that.

See above for 0.5mm drilling. Now an option!

Until the bit snaps. Occupational hazard.

Solar Telescope

Solar telescope
Coronado P.S.T.

There are a wealth of options when choosing a telescope. Refractor (lens), reflector (mirror), or catadioptric (both)? How large an aperture (because letting in more light lets you see fainter, more distant objects)? Manual or computerized control? Optical viewing, astrophotography, or both? Alt-azimuth or equatorial mount? And so on. Dedicated astronomers can get deep in the weeds on the finer details.

What they all have in common is a BIG WARNING often in BRIGHT RED ALL CAPS that you should never, ever, point your telescope at the Sun. It’s solid advice.

Looking directly at the sun with your naked eye is likely to cause permanent eye damage. Doing so with the extra light-gathering power of a “light bucket” only accelerates the problem. Even if you don’t peer through it, the heat that builds up within the telescope’s delicate optics is enough to irreparably damage them and ruin your very expensive equipment. What’s an aspiring solar astronomer to do?

Find a solar telescope, of course. A few special features make this telescope safe for solar viewing (and somewhat less useful for anything else). It has a very small aperture, because it really isn’t necessary to collect more light from the brightest thing in the sky. It has a small section of opaque glass on top of the telescope which shows a pinpoint of light when the sun is approximately in view. And, best of all, it has an narrowband filter around H-alpha.

H-alpha is a specific wavelength of light emitted by excited hydrogen atoms, about 656nm, and the brightest hydrogen emission in the visible wavelengths of light. It’s quite red. It’s also, through a suitably narrow filter, something you can safely observe with your eyes. Pare away the other visible light, all of the UV and IR, and you’re left with the sun. Red, intense, and through the proper set of optics, magnified so that you can see amazing things.

Prominences erupting from the surface. Dark filaments that indicate region of magnetic shear. Sunspots and flares. The speckled, roiling surface of a star that’s like an orb of churning lava. It’s very cool. Astronomy you can study without staying up all night.

Still a bust on cloudy days.