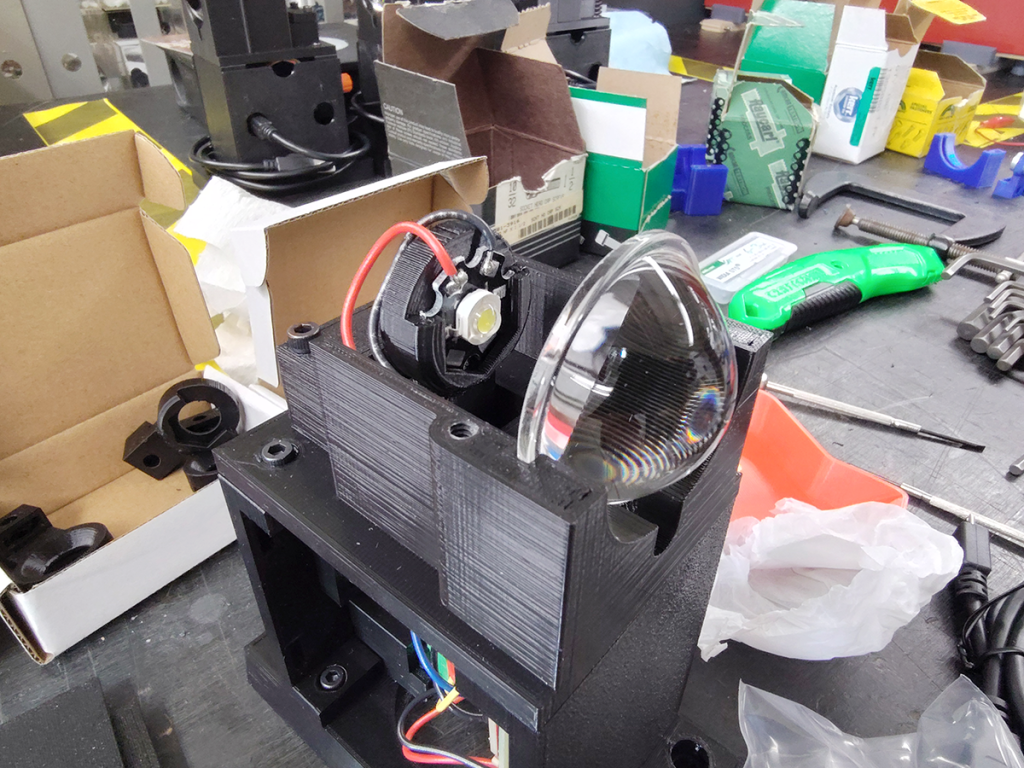
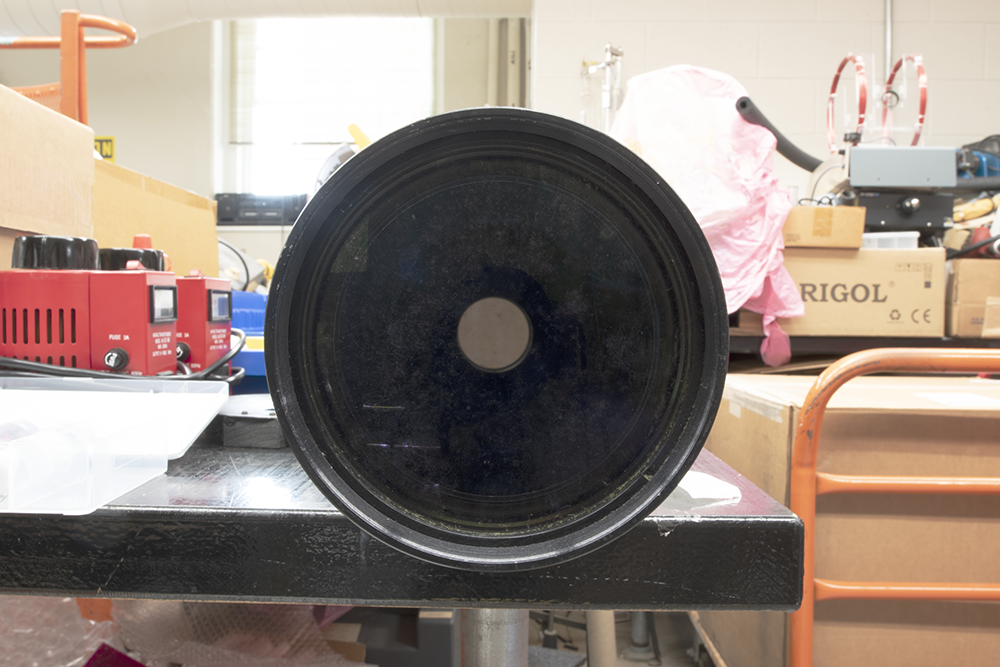
LEDs can do some excellent things, primarily generating a lot of photons for very little power input, with the opportunity to have a fine degree of control over the details. Optically, though, they need a little help.
Fortunately, for our undergraduate labs in need of an adjustable light source, a spherical glass lens and an adjustable housing collimate them well enough. Which, when you need to build a lab’s worth of these things, makes life in the basement a whole lot simpler.
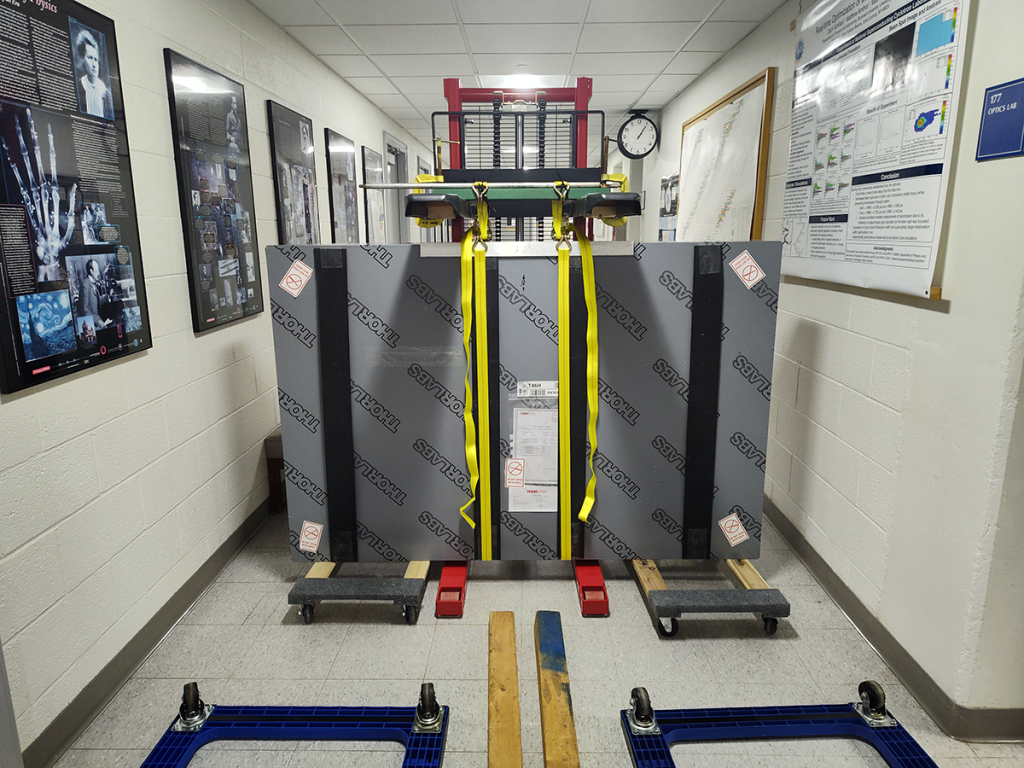
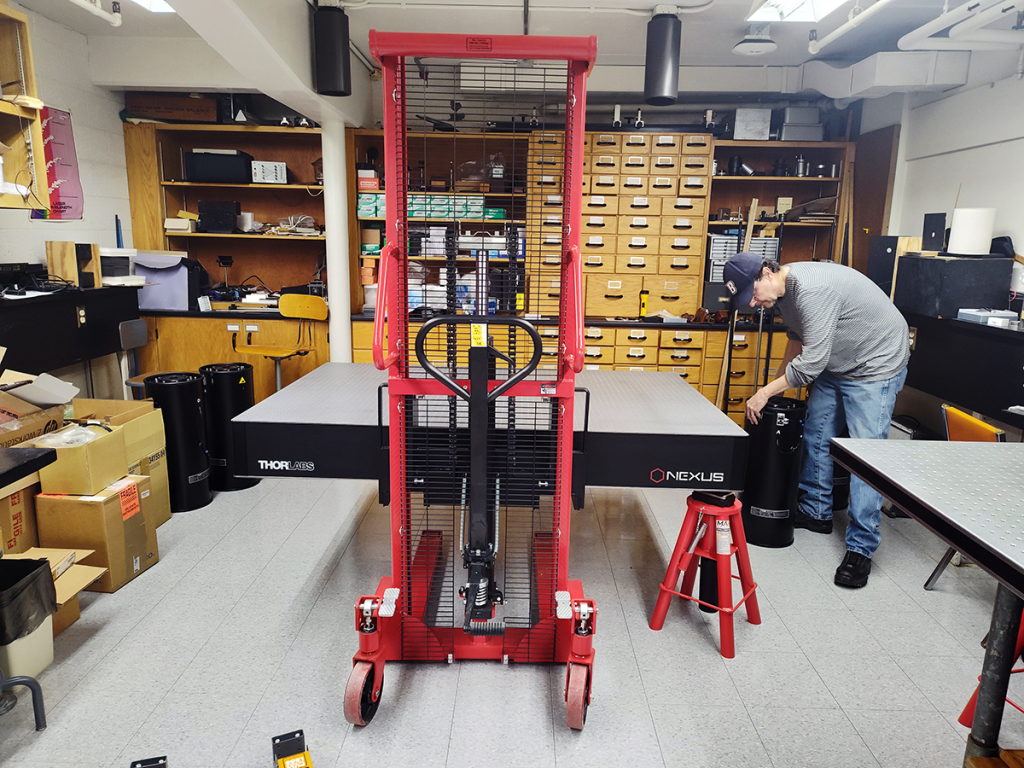
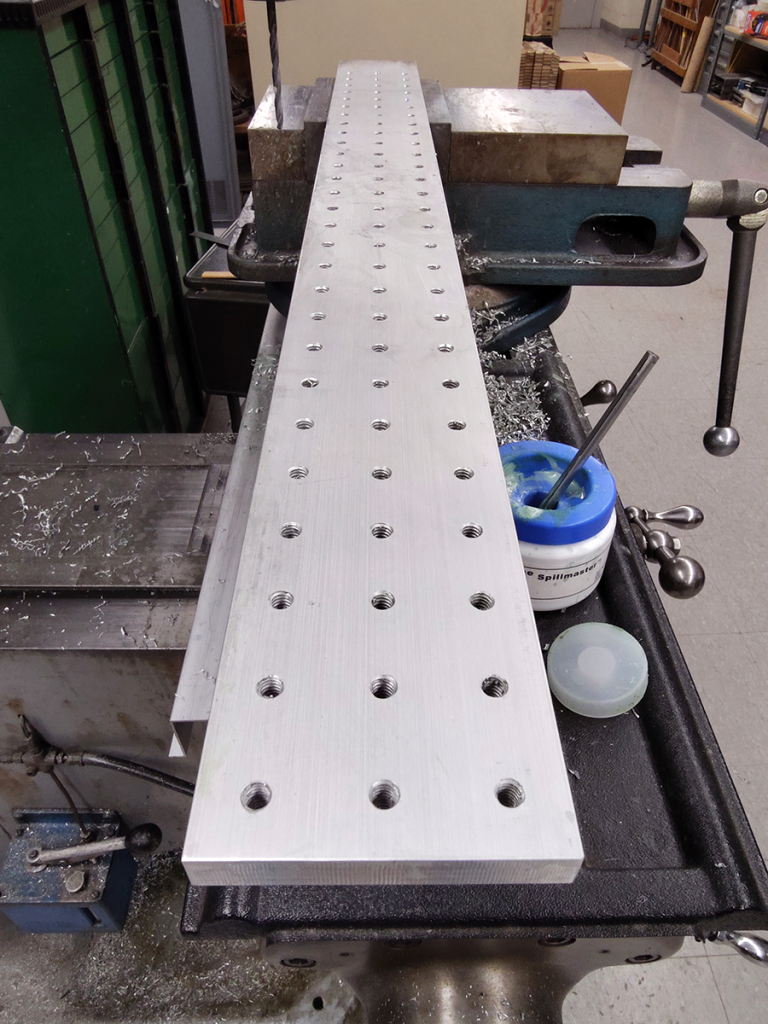
Need a thing, but can’t get it in the right size, right shape, right odd set of dimensions? That’s one reason to keep a workshop in the basement. If we can possibly make it, we’ll certainly try.
Pictured: a custom optics breadboard, for a very specific apparatus, with many, many drilled, tapped, and cleaned 1/4″-20 mounting holes. It’s big, and shiny, and has a bright future ahead!
Probably with lasers or something. Lots of lasers around here.
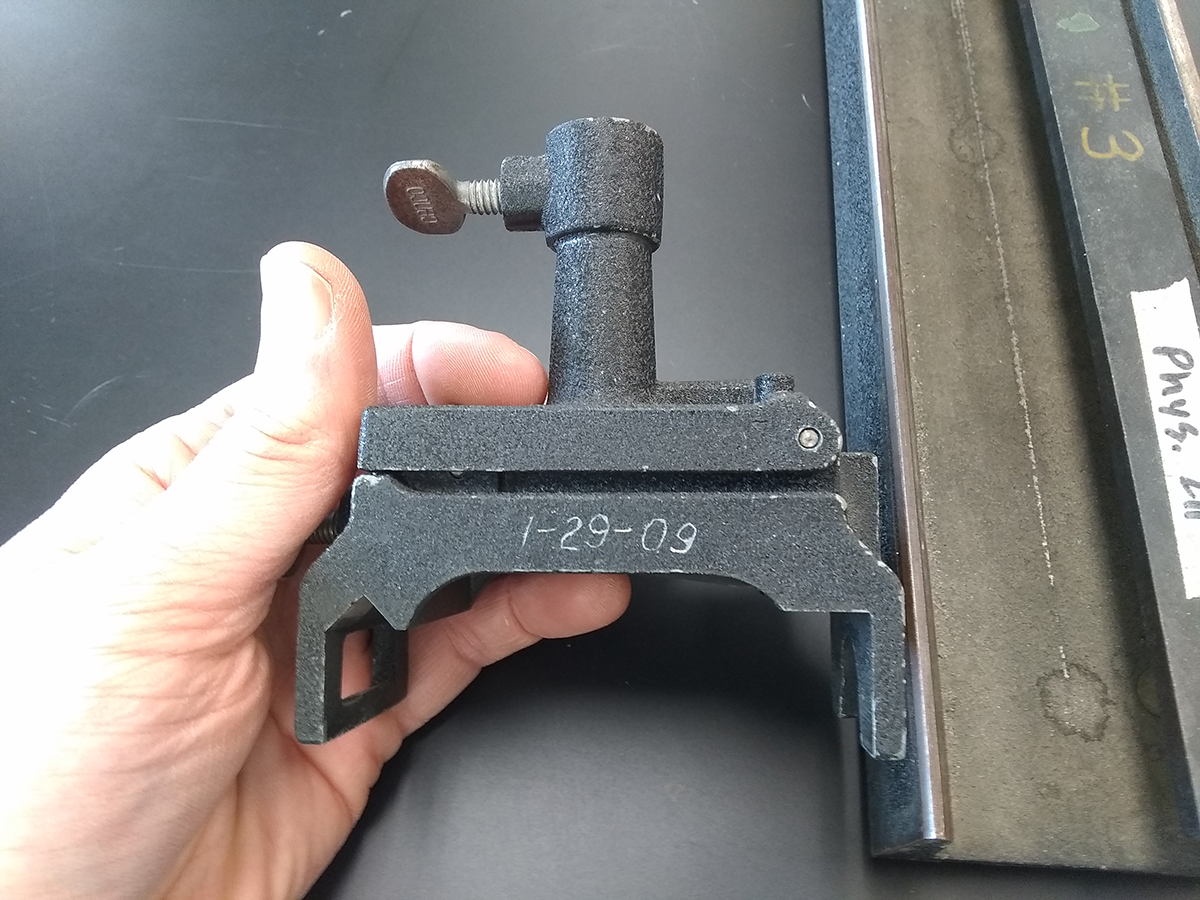
It can be a real pleasure to find old objects lying around, with their dates of acquisition marked on the side. January 29th, ’09!
Which ’09, exactly?
Yup, still in Olin 269
Olin Science Building was constructed in 1954, so it’s doubtful this particular post holder dates back to 1909. Especially as the lettering on both sides matches up.
So we were still purchasing equipment for the old, cast-iron optics rails as recently as 15 years ago? Wow.
Much of our day revolves around the Physics and Astronomy labs in Olin Science Building, which was the finest construction the budget could shoulder in 1954.
Which, after 7 decades, some renovations, and who knows what else, means there are a few minor holes here and there.
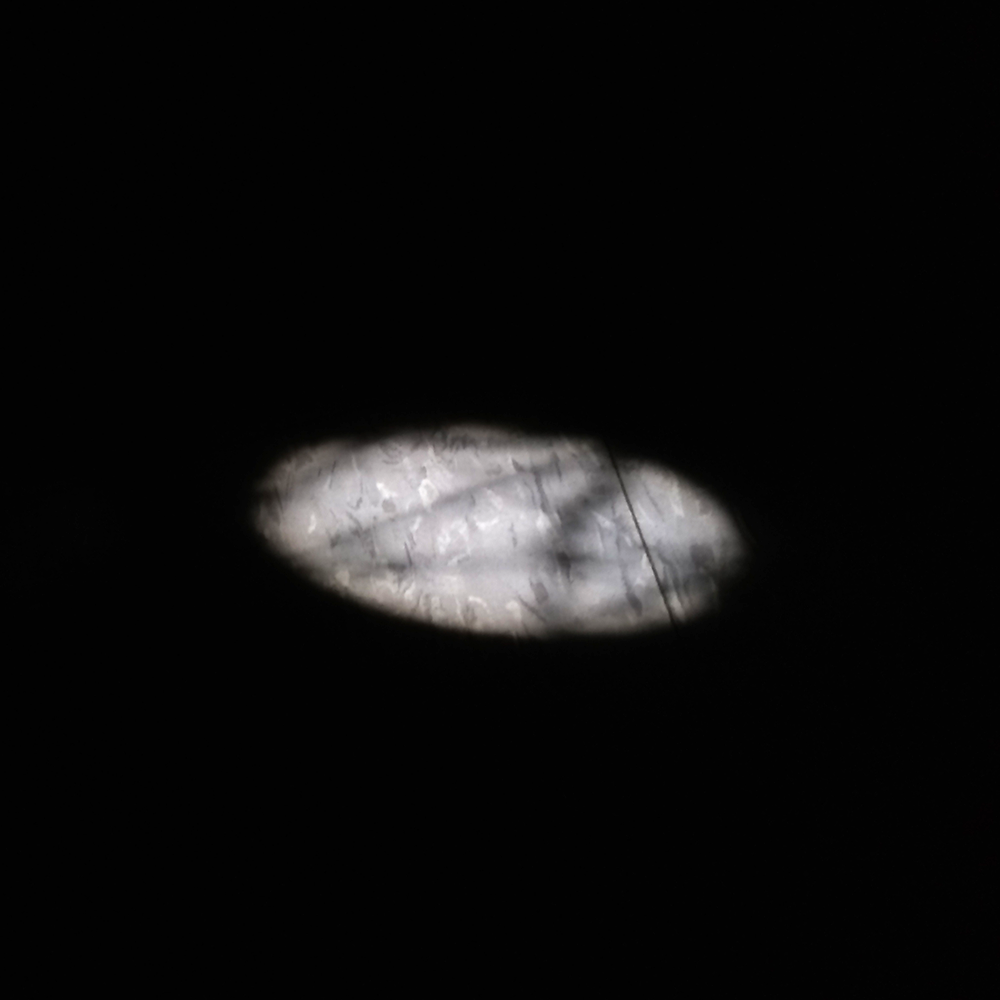
Holes which act like a pinhole camera in an otherwise dark lab, casting images of the sun and tree branches on the floor.
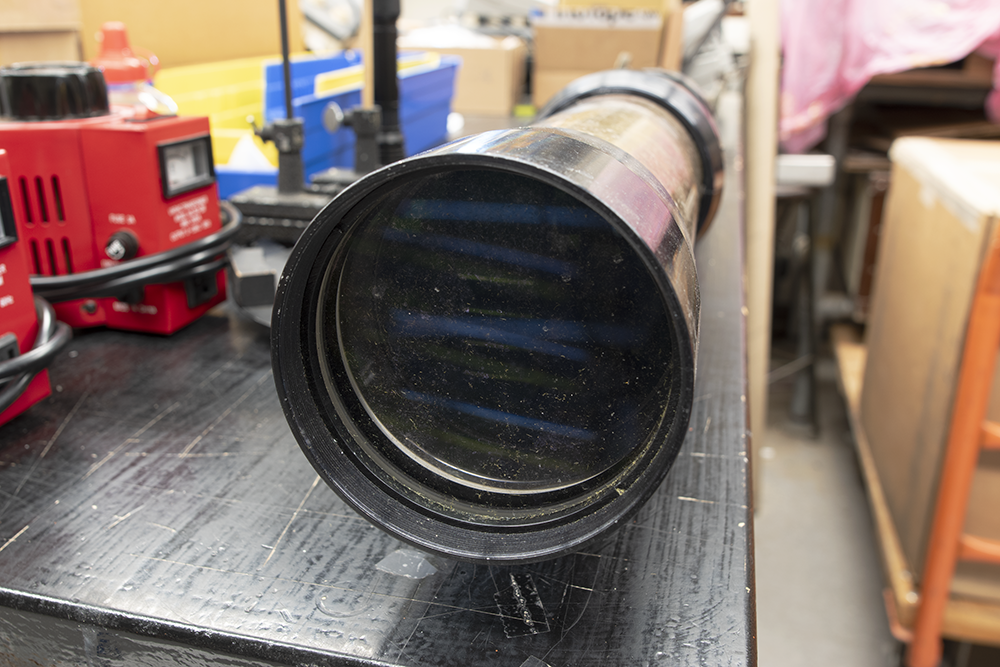
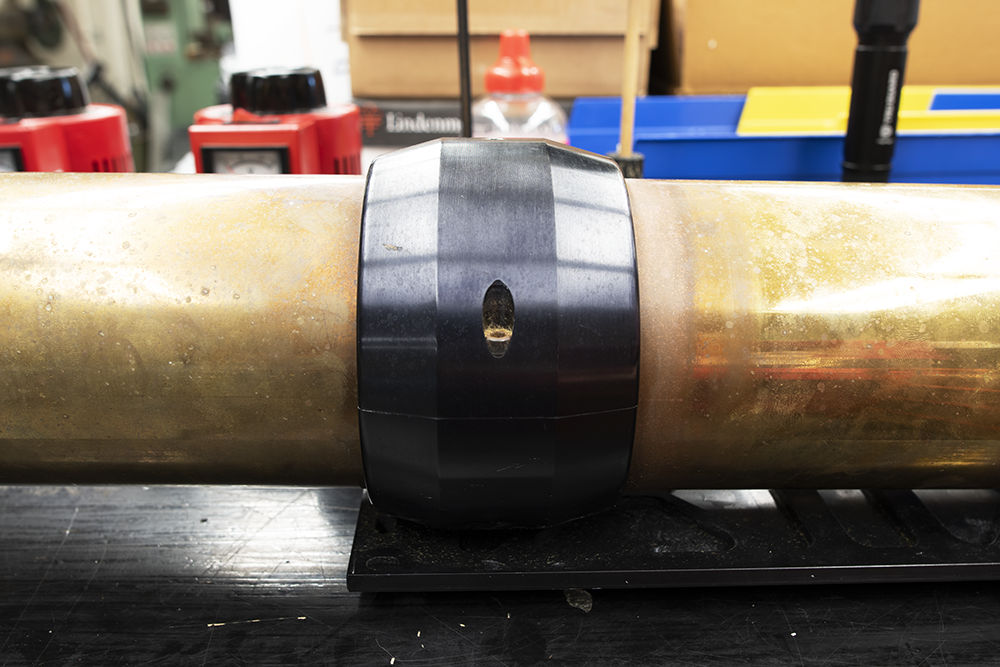
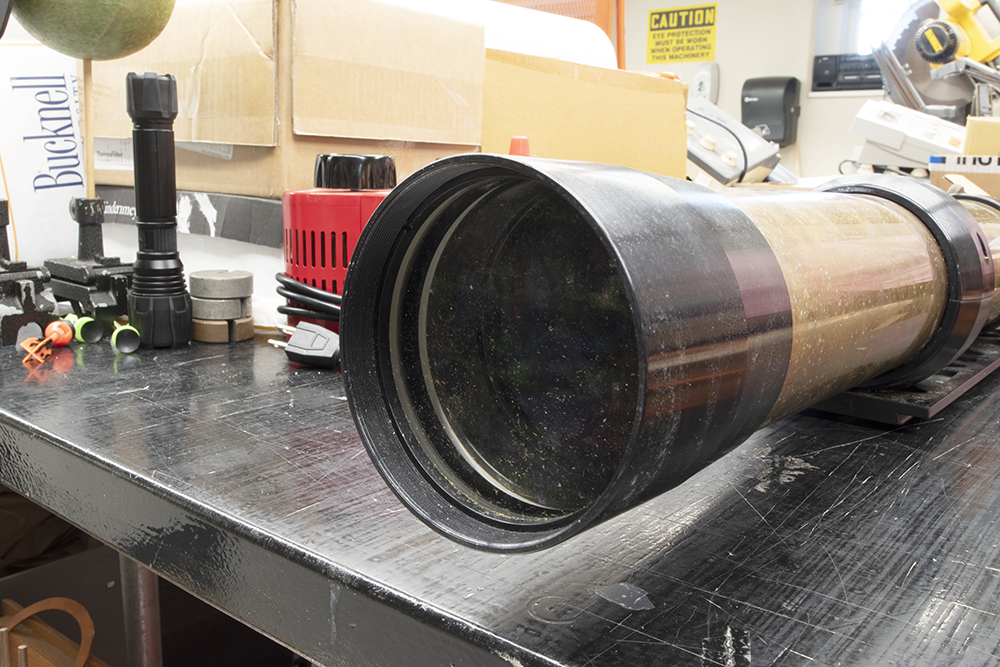
For the most part, the light accumulation of dust, pollen, and other stuff on the objective lens of your telescope is a thing you live with and ignore. The damage you can do to the lens and its optical coatings is far more severe than the minor loss of image quality from tiny flecks. Known and accepted trade-off.
Here, however, we have a classic TeleVue Renaissance that’s still in good shape. Aside from the dust and dead spiders, anyway. Exact age is unclear, but we can roughly place it between TeleVue’s founding in 1977 and the construction of the “Halley’s Comet” models in 1985. Serial number 1100, for anyone keeping track at home. Even dust-covered, the optics appear good at a quick glance, and they have a reputation for remaining in good shape for a long time.
There’s a bit of chromatic aberration when you look closely, an issue which has been resolved in their current models. (Optics = hard.) The design type is called a Nagler-Petzval, which uses a pair of lens doublets to correct numerous distortions caused by refraction. Every design has its pros and cons; this one’s quite nice. Our version has – we think – an air-spaced doublet (two lenses utilizing different curvatures) as the objective, and a cemented doublet in the rear.
At least, that how the Halley’s Comet edition was made. The current optics update utilizes two air-spaced doublets – see the diagram for the NP101is – so it’s reassuring to see that the improvements are incremental. Good sign for the one we have.
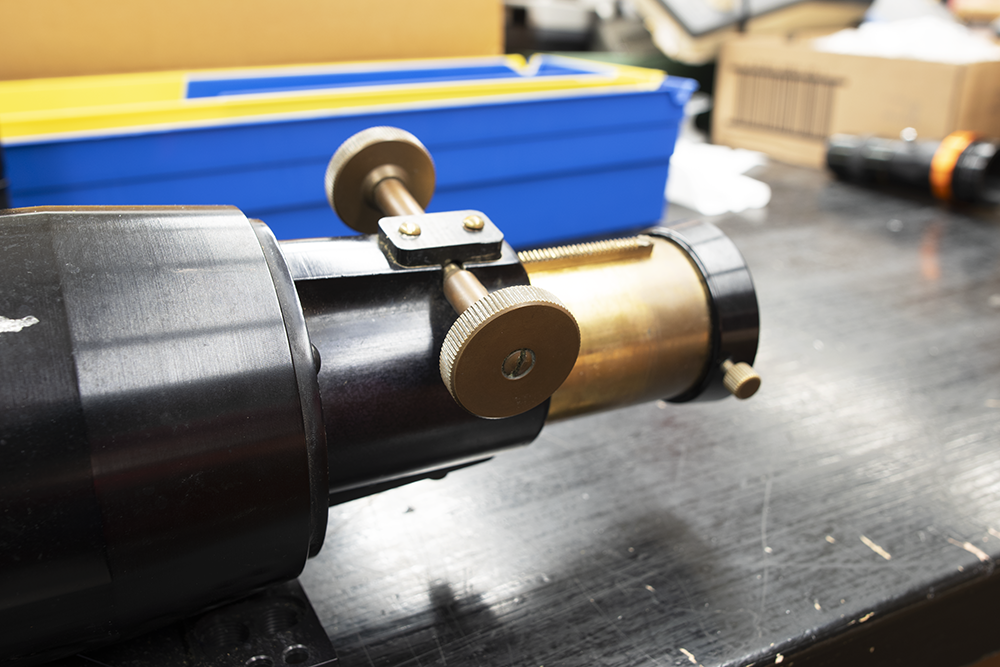
Okay, the brass could’ve aged better, but it’s got character!
Needs polish.
Black on brass looks good.
Nice touch.
Even the knurled knobs on the focuser are brass. We don’t want to leave this for display, however. We want to see the stars!
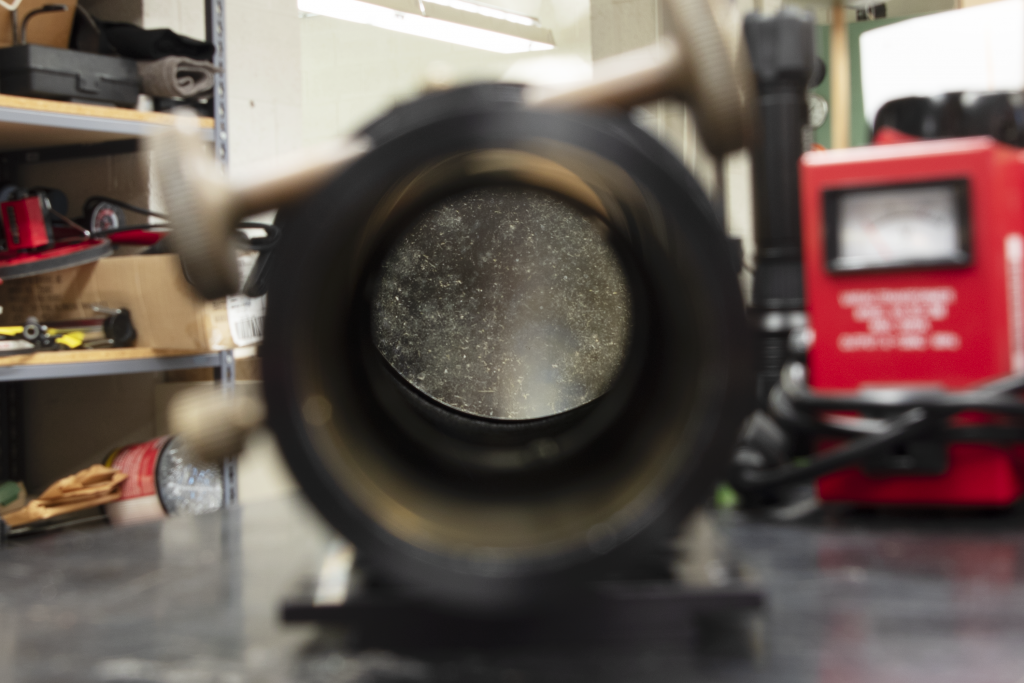
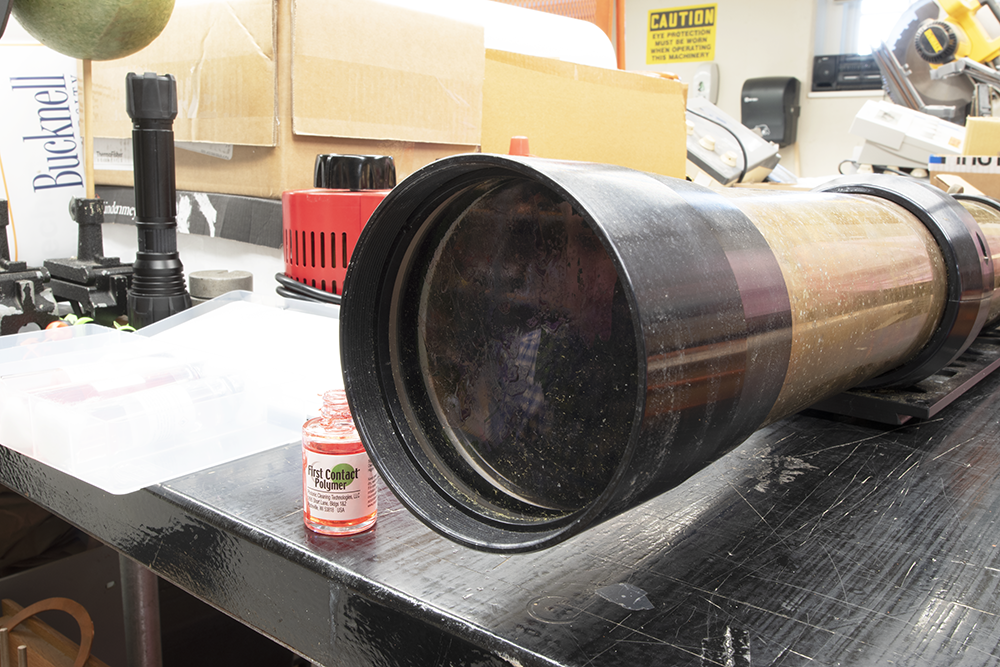
Eesh.
That dust, though.
Speckly.
Yeah, definitely a problem. A cleaning is in order.
Can’t make it worse, right?
Not pictured: the dead spiders removed with air from a bulb blower. Dead spiders do not improve optical quality.
Red goo.
Here, we’re applying a coat of First Contact polymer cleaner, an expensive but effective treatment for safely removing gunk from precision optics. Comes in a wee bottle like it’s nail polish and smell like nail polish remover. Because it’s got acetone and other solvents in it.
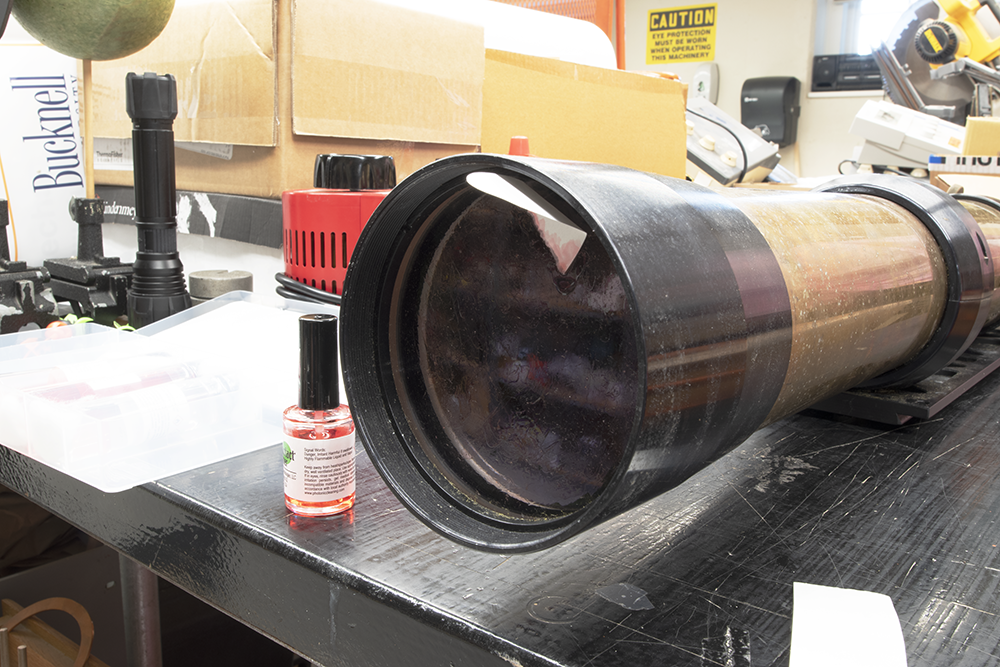
Drying before removal.
Once it dries, that little tab lets us pull away the pink film with all of the dust and debris stuck in it. A good time to wander away from the stink of volatile solvents and get a cup of coffee.
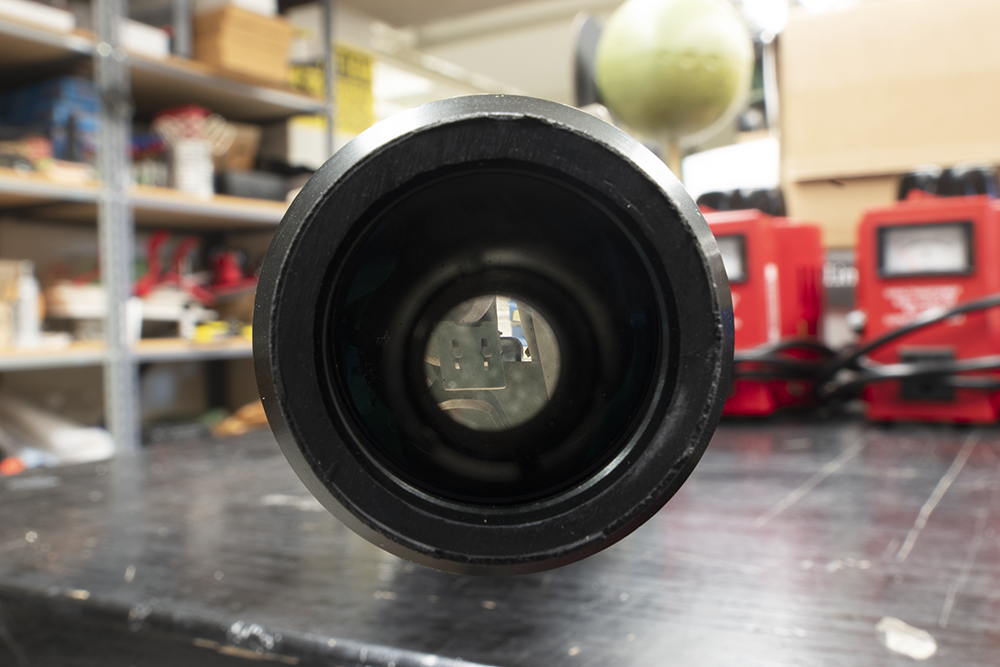
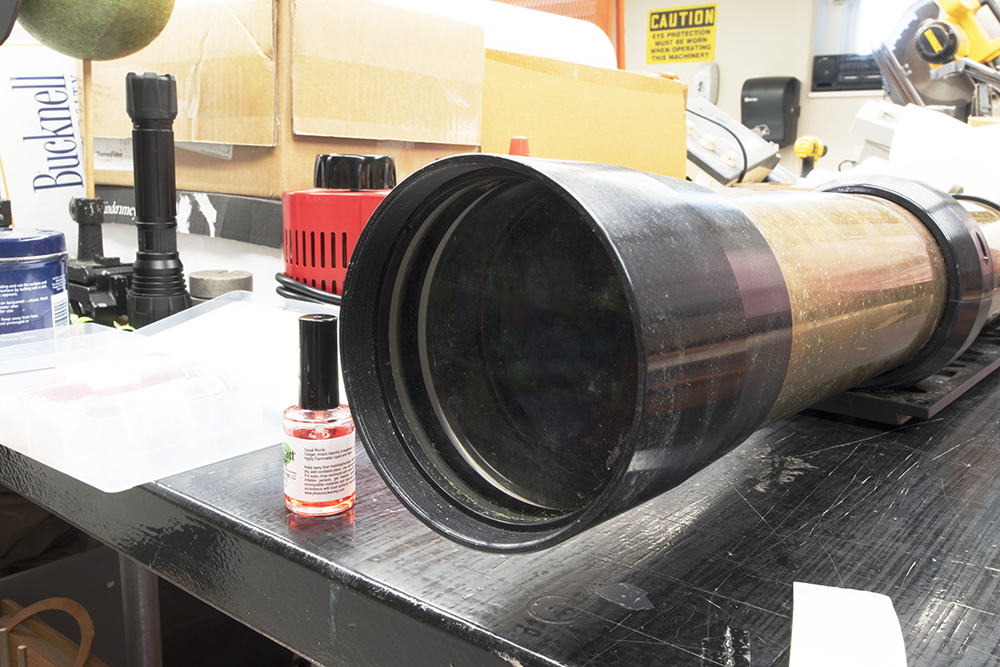
Much improved.
And, well, that’s a substantial improvement.
Water spots. No dust.
It’s not perfect. The polymer is very good at removing particulates, but less so at water-soluble stuff. Once we evaluate this with a camera setup, we can see if a follow-up cleaning with deionized water is necessary.
Big improvement.
Problem there, of course, is that we run the risk of introducing tiny scratches in the process. Could be worthwhile if the effects are still visible, but we’re still erring on the “do a minimum of harm” side of things.
Despeckled.
Will it live up to its potential as an imaging ‘scope? Maybe. There’s a fair chance. If not, we’ll keep it around as a stylish yet usable throwback for visual observation. The best telescope, as they say, is the one you use.
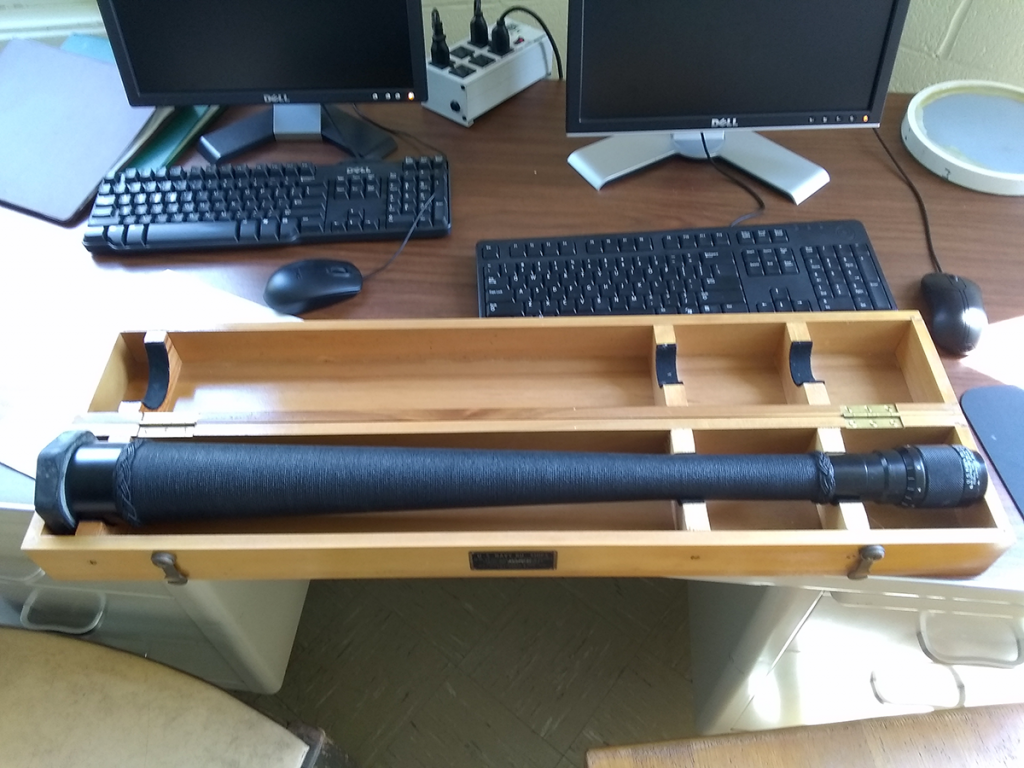
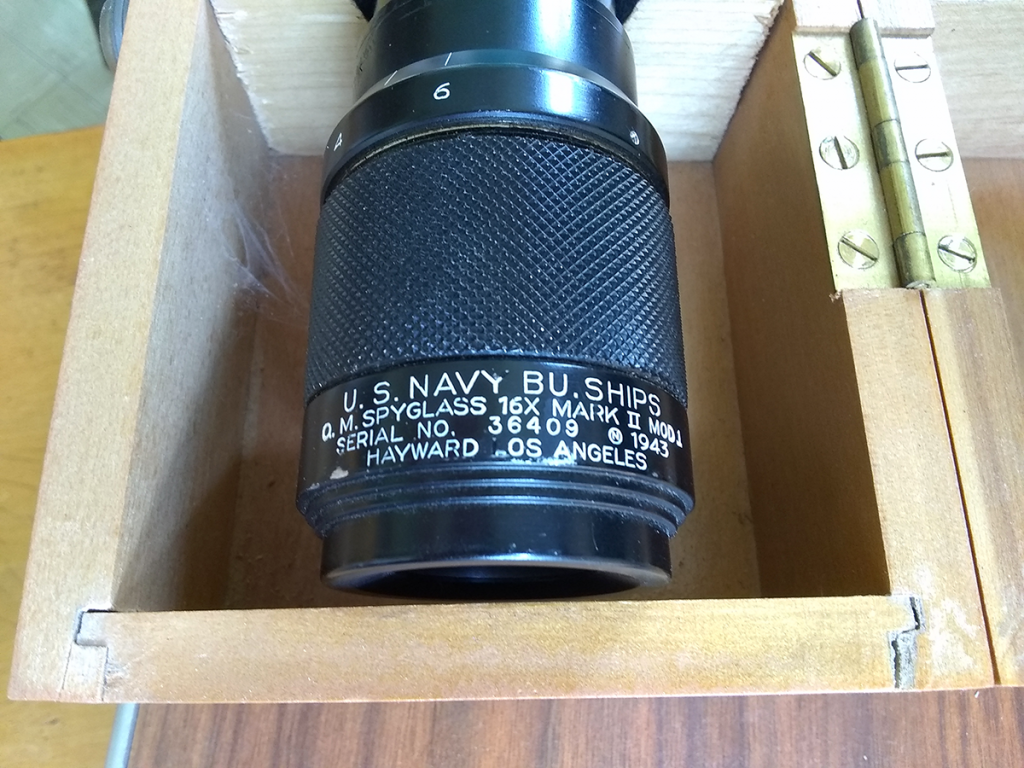
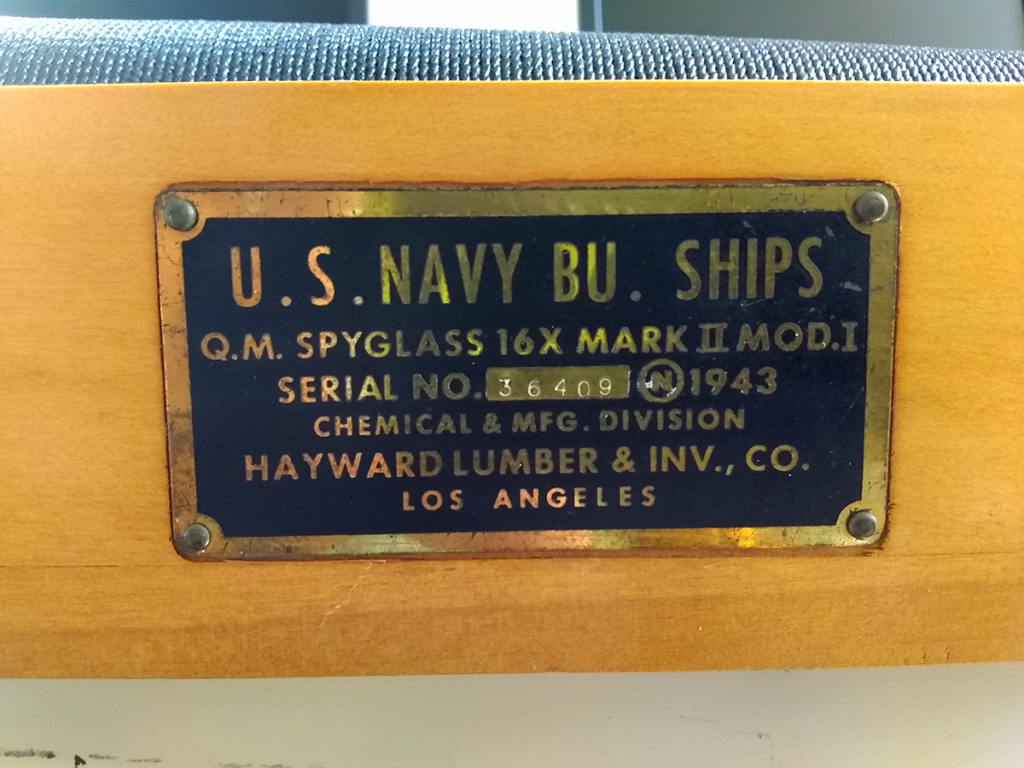
It’s not just telescopes at the Observatory. We also have a spyglass. What’s the difference?
There are a variety of potential optics for a telescope, using reflectors to reflect and focus light, using refractive lenses to bend and focus light, using mirrors to turn a beam around corners, using these in combination. Each has its pros and cons, and careful optical design and precise manufacturing work to gather lots of light, to provide good resolution and magnification, and to correct for optical aberrations.
And in doing all of that, the image reaching your eye or the camera sensor gets flipped upside down. Also in reverse, if you’ve got a mirror in your optical train. When looking at stars and deep sky objects, that’s not a big deal. “Up” is arbitrary in space. For terrestrial viewing, however, up matters. Seeing that incoming pirate ship upside down is disorienting. So a good spyglass keeps up as up.
1943!
It does so by using a Galilean refractor design, which has a concave lens in the optical assembly to avoid the upside-down flip. The resulting telescope is necessarily longer than a comparable refractor with convex lenses, and thus heavier. That weight tends to limit the possible objective aperture size, and the practical magnification limits are low. Still: very effective for spotting Edward Teach at a distance, or for identifying the four largest moons of Jupiter.
Binoculars, incidentally, manage to keep the world upright thanks to a set of prisms between the objective lenses and the eyepieces. Yet another handy trick in the optical design toolkit.
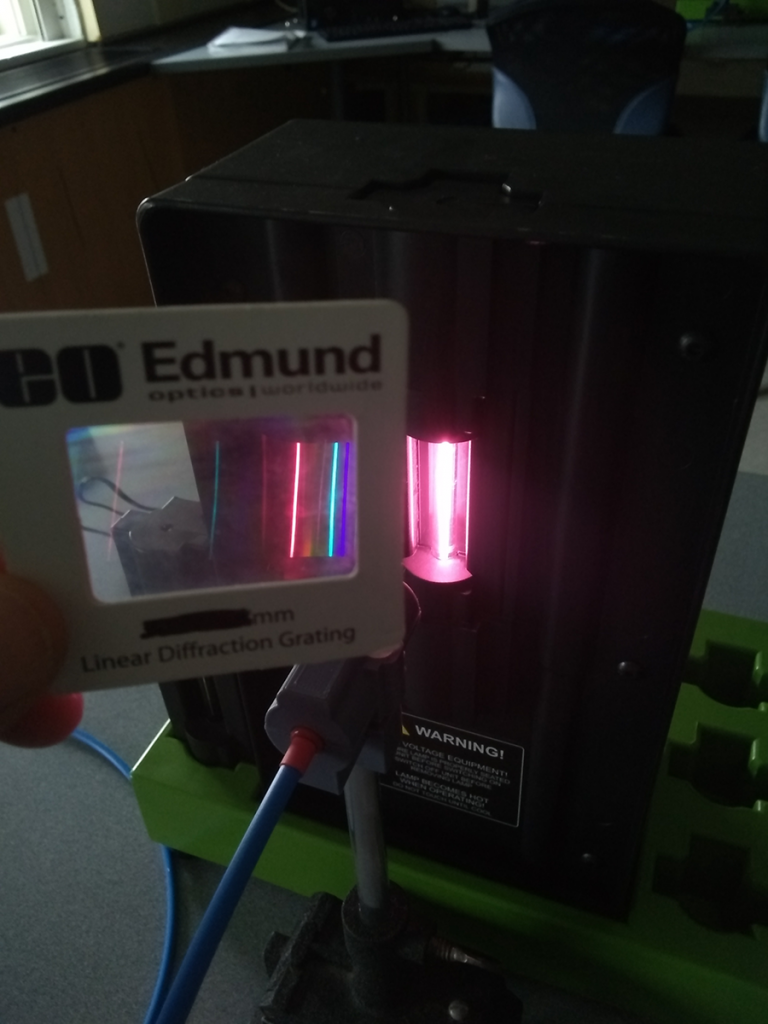
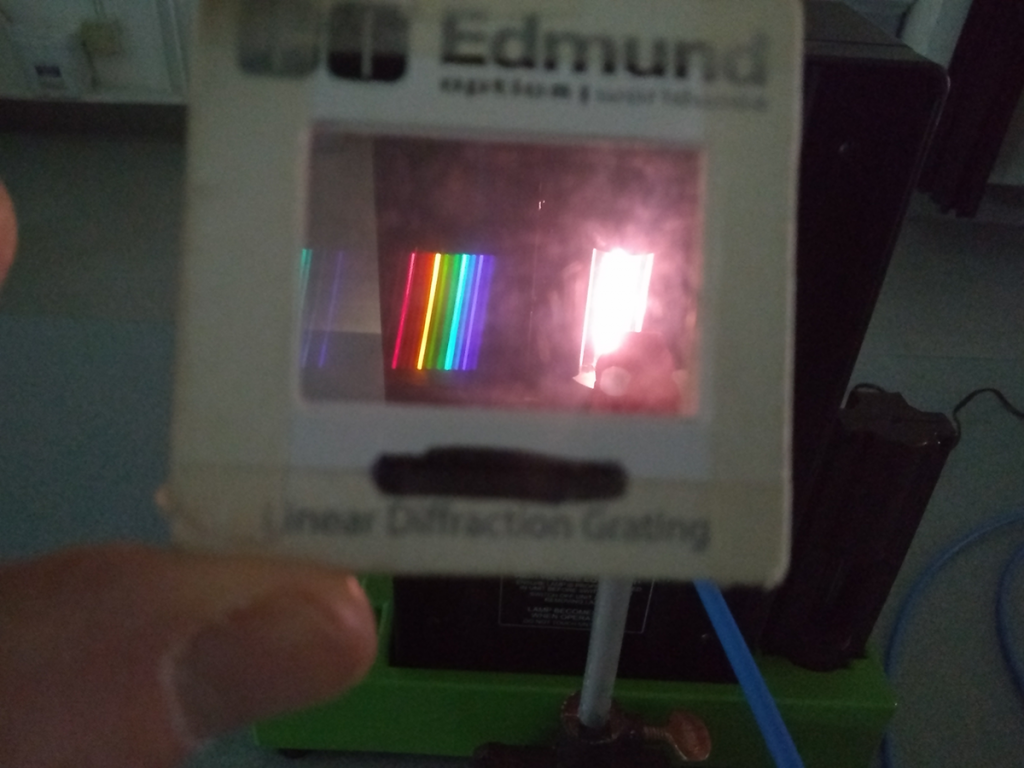
Sometimes, we have old equipment which is rarely, if ever used. Case in point: the mid-20th-century spectroscopes which have been supplanted by digital spectrometers. They’re both effective tools for examining a spectrum of light, one by eye and the other fed by a USB cable. Using a diffraction grating, they split light into its constituent spectrum – its rainbow, more or less – and can identify the presence of individual wavelengths. Not something our eyes can do, as they blend everything together, though that’s very helpful in most situations, such as reading this on your screen.
Summing bands of reddish, greenish, and bluish into a broad rainbow of colors is one neat-o trick.
With a diffraction grating, reflection grating, or prism, you can refract light out along a range of angles which correspond to its constituent wavelengths. Put a sensor at a known angle – your eye or a semiconductor exhibiting the photoelectric effect – and you know the wavelength if you sense a photon. It’s a simple piece of information which can be used to unlock a staggering amount of interesting, related information about what you’re observing.
Hydrogen.
You can also use a diffraction grating to get a quick sense of the entire visible spectrum of a source by holding it off to the side. Remember: the angle of the light’s path change as it refracts, so you’re trying to angle it back to your eye. Hydrogen has a distinctly pinkish-purplish hue when excited at high voltage, and you can see the dominant red and blue lines in its spectrum. With just that one electron to absorb energy and emit photons, the spectrum can only be so complicated.
Helium.
That’s in contrast to helium, with its two electrons. The spectrum doesn’t look white, per se, but is much more filled out than hydrogen. Look at those spectral lines, and there are so many more! They’re distinct, measurable, and provide a “fingerprint” that can be immensely useful for scientific study. Or for just looking cool.
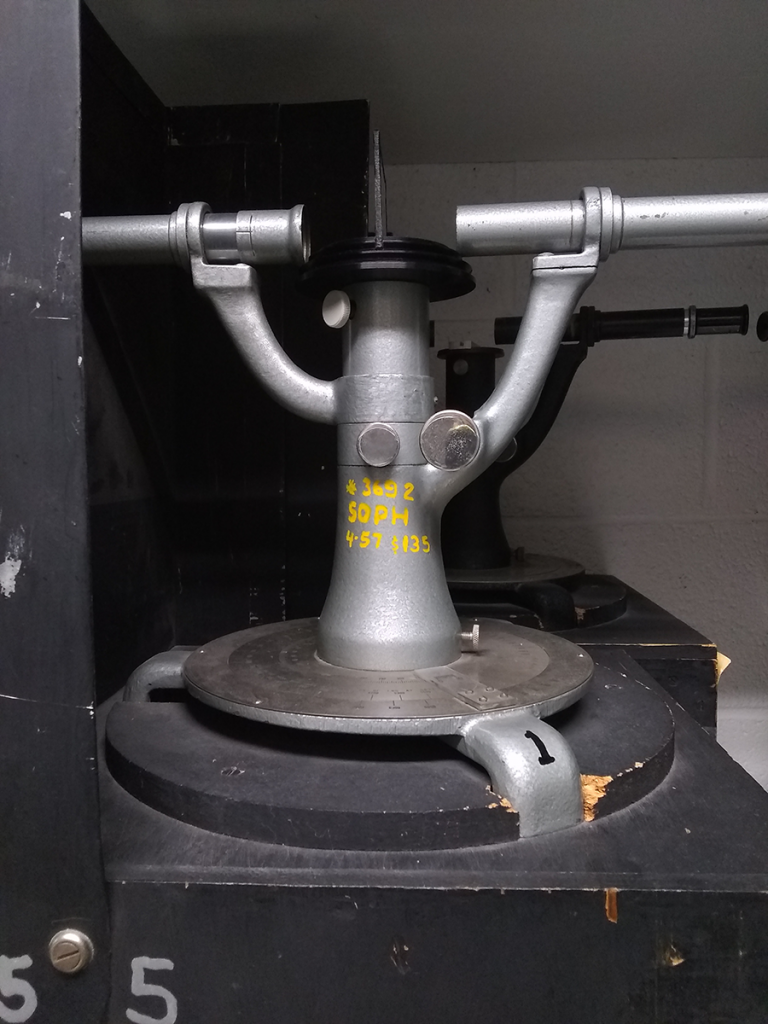
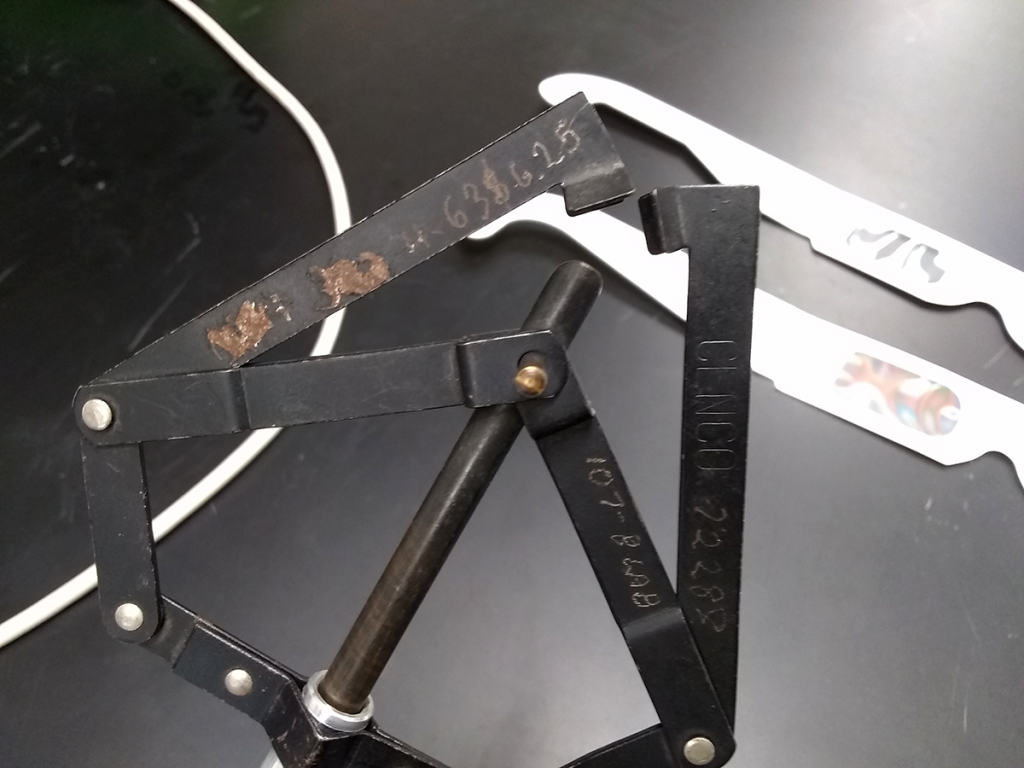
Our old iron optics rails get very little use anymore, as we phase them and their accessories out. Most of them, that is.
We may not use the old glass lenses much – sometimes, not often – but the spring-loaded holders still come out from time to time. They grip certain oddly-shaped objects well, and their heavy iron bases do an excellent job of keeping things like fiber optic cables upright and in place.
Rapidly approaching 60 years old, lens holder. April 1963, $6.25. That’s $61.31 in today’s dollars.